 |
| (Pictures are taken either by my awesome Rena or me!) |
God Tier Jade Harley from Homestuck has been my most worn cosplay so far, so it only felt appropriate properly kickstarting this blog by giving an in-depth report of my construction process! I already have a writeup on my AC Paradise page, but there’s more room for detail here, and I can post my old progress pictures without having to cough up a monthly fee.There are at least a million and a half God Tier Jade tutorials and/or write ups out there, but I really want to have a solid record of how I made my costume, and of course to potentially answer questions! I hope that if you’re looking for a solution to a particular roadblock, that you will find it here! And of course, if you’re wondering about something that I didn’t write about, feel free to leave a comment!

Outfit Breakdown


(excuse the messy room!)


(some design references! Google has plenty of images, of course)
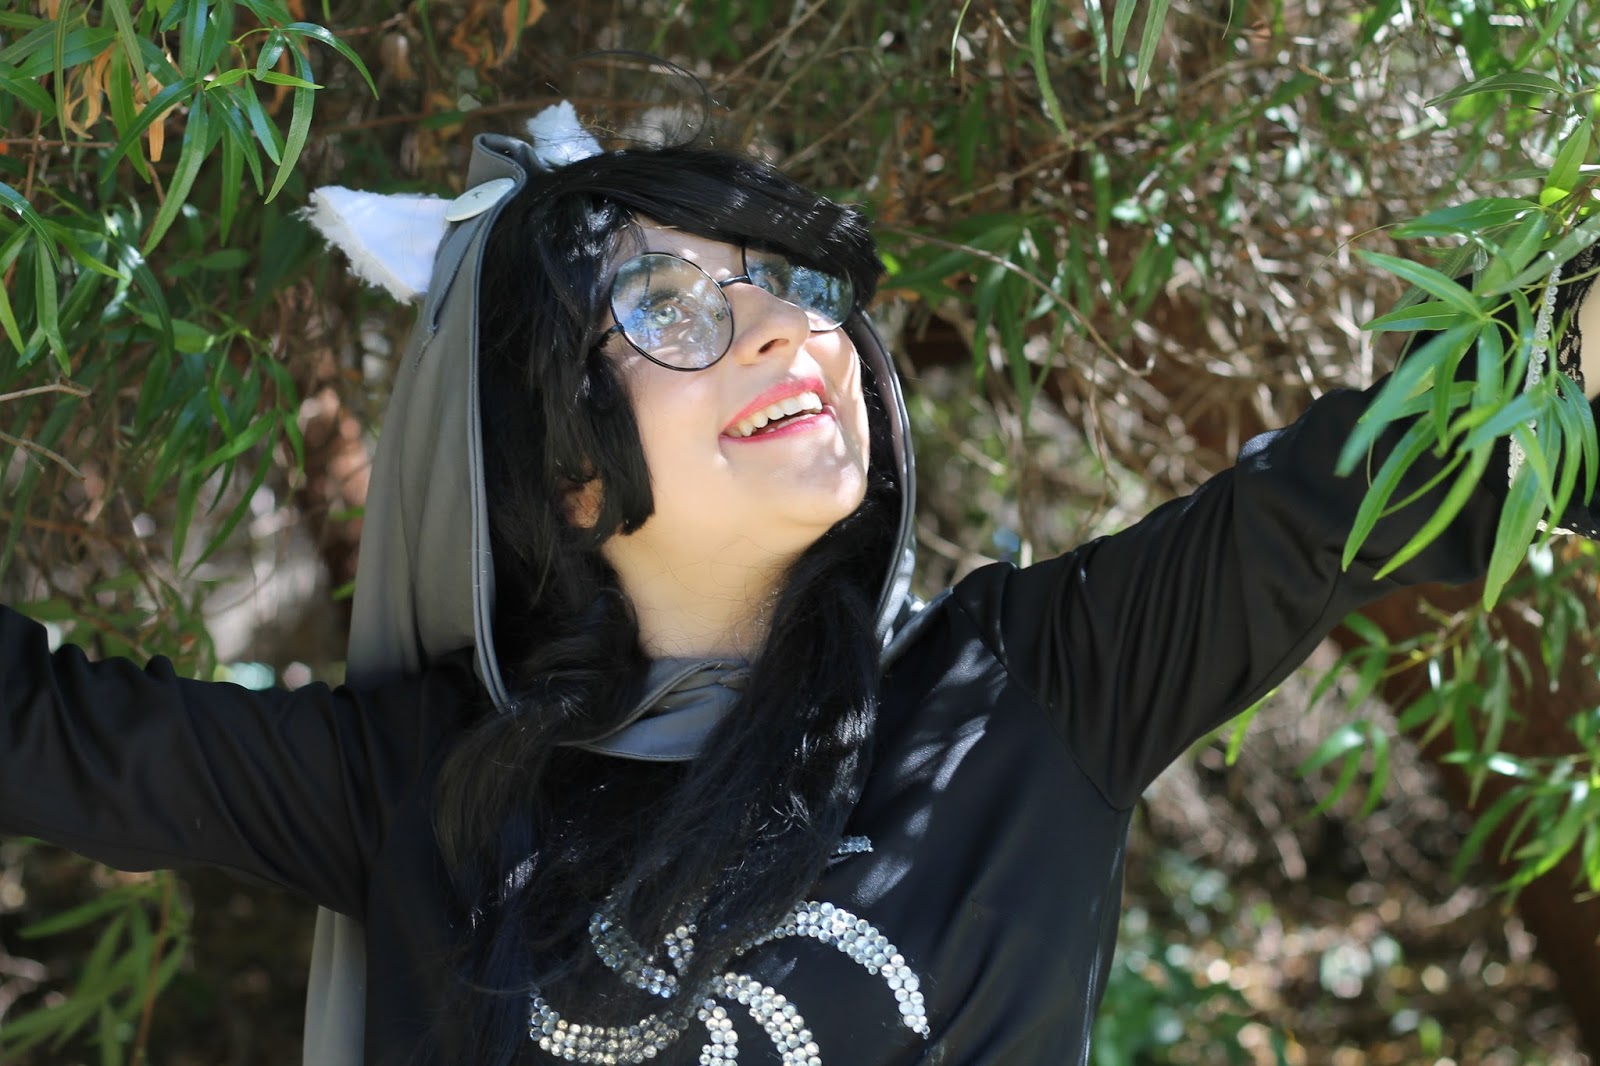
Jade’s God Tier does not have an especially large amount of costume components. From head to toe, she has a pair of adorable little white dog ears, goofy round glasses, her all important “witch” God Tier hood, a pointed black tunic with the Hero of Space symbol on the front, a gray skirt, and striped stockings and ruby slippers A La the Wicked Witch of the East-but, in my opinion, Jade is the sweetest witch around!
From here on out, I am going to breaking down each aspect of her ensemble, and discuss how I went about making it. There is no set in stone, objectively correct way to make this, or any other cosplay for that matter. Lord knows that are things that I would do differently now that I’ve had more experience. At the time, this is simply what worked for me, hopefully you can extract some guidance from it!
Tunic
Fabric wise, there are lots of options for Jade’s tunic! Cotton or polyester, knit or jersey (even velvet!) can all be beautiful options for it. The fabrics I’d advise steering away from are Halloween costume satins with excessive shine, and very thin broadcloth cotton.
The tunic was made out of a fabric found randomly at Joann’s that I christened the black "mystery jersey” . While very pretty, it was surprisingly difficult to sew with: It moved all over the place while I was trying to cut my pattern pieces out, and it snags extremely easily. Doing the actual sewing with it was hard also, even with a zig-zag stitch. I definitely would not recommend working with this-especially if you’re a beginner. There are plenty of other stretch fabrics that are not nearly as finicky, so that is something to keep an eye out for!

 |
| My tunic materials and pattern! |
My pattern was a basic shirt that I modified to my liking. I lengthened the sleeves, and I made them huge at the ends! Since Jade’s title IS the Witch of Space, I wanted them to resemble a wizard’s, so the cuffs are massive and hang down! The shirt hem was trickier than expected: Jade’s tunic is actually longer in the back, so extra math is necessary to accommodate for this. Math is the area I’m weakest at sewing wise (and life wise, really!), so this was a challenge. Admittedly most of it was guess work and random measurements that managed to come together, but I would advise keeping the shirt longer, so it won’t look too short after you hem it!-The length of mine is alright, but I would prefer it to be longer.
 |
| The tunic's very basic shape! |
The sleeves are hemmed with sparkly black lace, with white braid glued along the cuff-which is really an example of poor craftsmanship! Please don’t do this. Smack yourself if you’re considering doing that, and force yourself to stitch it down. You’ll thank yourself later when the braid doesn’t start coming undone!


(Wizard sleeves!)
The most time consuming-but, not the hardest- part of this costume by far was my space symbol. Instead of appliquéing the symbol or even painting it on, I decided to make it entirely out of rhinestones! The rhinestones were my way of amping up the space motif, since they remind of tiny twinkling stars! Actually applying them on the other hand was extremely tedious-Basically, I was hunched over my kitchen table applying these tiny rhinestones by hand for over fifteen hours! The amount of minutia involved was ridiculous, but the truly obnoxious part was how easily the came off! Only a simple shake would send them raining down. This was due to the type of glue I originally used for them. The one thing I can take away from this project? Fabric glue is absolute garbage, and don’t ever use it. It adheres terribly, if you could it even describe like that. After the fabric glue fiasco, I went back and reapplied everything with tacky glue (!), and they still have remained secured after multiple rewears. The rhinestones were a pain to the say least, but the way they catch the light and sparkle makes it totally worth it!


Sadly, this shirt has seen better days and it is nigh time to put it out to pasture. Because of how delicate the fabric is, it is prickled by tiny snags, and there is now a giant run at the side of the shirt. God Tier Jade is definitely due for a tunic remake!

Skirt
Skirt: I’ve seen adorable Jade skirts made out of cotton or other stiff materials with a petticoat underneath to make it poofy if a look like that is more of your cup of tea. Like my shirt, I wanted something that had more movement and stretch, so anything stiff was off my radar. My skirt is actually made out of something that I had never heard of it until I saw it at Hobby Lobby: It’s actually this nifty fabric called “travel knit!” Since it is designed to withhold, well, traveling, it is extremely wrinkle resistant, super sturdy, and looks and moves gorgeously to boot! Doing actual work with it is an absolute pleasure because it cuts through like soft butter, and there was minimal slippage while actually sewing it.
Actually putting the skirt together was very straight forward: No store bought pattern necessary! All it is are two large triangles that were sewn up on the sides. I made a casing for the elastic by pressing and stitching down the fabric at the waist. I left a little “pocket” for the elastic, so I could feed it through the waist and gather it in the process-it was basically killing two birds with one stone! After I gathered it to the correct fit, I simply snipped away the excess elastic and sewed it down! At the hem of the skirt I actually glued down some black bias tape-which, leads me to deserve a smack myself. Extra rhinestones were glued down along for more spacey fun!
For a two day project, I am very pleased with how it turned out! Gathering it was the key to making it look as nice it does: it gives it gorgeous movement and drapery. That has to do with the stretch travel knit of course, but regardless of the fabric you decide to make it out of, it is certainly worth doing.
 |
| (Unfortunately, I couldn't find any pictures of my skirt progress, so I hope this completed picture of it will suffice!) |
Hood
It was a necessity that skirt and hood matched, so I made it out of the same fabric. This was actually a brilliant decision! The secret to a good looking God Tier hood relies in the fabric choice. A simple, stiff cotton does not give it the essential flowy movement. So, when shopping for your fabric, stay clear from the cottons, and look for something that is “silky” with lots of bounce and drapery potential instead!
Patterning the hood was the most challenging part of this cosplay. Patterning is an aspect of sewing that does not come easy to me at all, so figuring out the shapes and measurements required lots of calculating brainwork. The basis for it actually came from this particular John God Tier tutorial (link here) since Jade’s looks similar. However, while John’s looks a wearable windsock, Jade’s is this double tailed monstrosity. I basically messed around with shapes using a roll of freezer paper, until I came up with something I liked. Doing the actual sewing was pretty straight forward: I cut out my pattern, folded, and sewed it right up (with of course, leaving a spot to turn it). Near where the two tails converge required tapering. This was what really made the two shapes distinct looking, and less bulky. The mantle/collar/whatever you would you like to call the base was made by patterning out the shapes I wanted, sewing the entire thing up, and turning it so the raw edging wouldn’t be visible. I attached the hood to the collar by following along with that John tutorial (which is just pinning the hood to the mantle, and sewing it up-easy as pie!). At the top of the hood I cut slits big enough for her dog ears using a rotary cutter! Directly in front of those is my slap job of a set of tabs. They’re little rectangles that I hand stitched onto the hood, with decorative buttons.They’re not functional at all, but they look right and get the job done. There are tutorials out there that can show you how to do this if you wish, but I personally couldn’t, and still can’t be bothered.
 |
| (Here's the collar! Not the prettiest picture but it works!) |

 |
| (Here's the what the hood looks like unfolded if you just need a visual! The wide rectangular head is the actual hood that goes over your head part) |
Ears
My dog ears are a bit of a joke. They’re two triangles cut out of fake white fur with two pieces of pipe cleaner sandwiched and sealed together. Leaving the pipe cleaner long so they could be nestled into my wig would have been the better option in retrospect. I originally glued them onto hair clips using E6000, but that caused wearing them to be a total trainwreck. The hair clips actually caused my hood to keep sliding back, which in turned lead to my wig sliding back all day and exposing my (gasp!) forehead and wig cap. After that mess I pretty much just slapped them onto an old headband and hid them under my hood, but please. Don’t be me. Just put in the extra thirty seconds of effort and leave the pipecleaners long so you can just shove it through your wig wefts.

Needless to say, these silly dog ears are in desperate need of some TLC. Whenever I get around to remaking these, I would ideally like to go for a more realistic route.
Stockings and Shoes
The stockings are purchased from We Love Colors!-but they are absolutely not worth the money at all. While durable, they actually came with some of the black fabric bleeding onto the white stripes. However, the stripe size was pretty perfect and that’s what I was obsessed with having. Really, that’s why I purchased them to begin with. My shoes are a pair of “ruby slippers” from Amazon! Even though Jade wears a pair of flats in the comic, I thought that heels would be more elegant and well, witchy instead. Wandering around the hard floor of a convention center is extremely taxing though, but it is totally worth it! They look so beautiful, but if you’re walking down the painful shoe path like me, it really might be in your best interests to keep a comfier pair on you to slip on.
Glasses

In retrospect, my costume is not especially well made, and at this point it’s pretty beat up. As soon as I first saw this particular outfit there was an immediate urge to cosplay it! I wanted to put my own spin on the outfit. Homestuck is infamous for having simplistic designs, so I wanted to adorn it with extra details! At the same time, maintaing the integrity of the outfit’s original design was important to me so the basic shapes are still the same!
My God Tier Jade is probably my dearest costume, in spite of this. I’ve worn it at least five or six times-even for last year’s Halloween! It is actually super comfortable, and as cheesy as it is, it just feels super homey wearing it! The moment I saw this design I knew in my heart that I would be able to pull off her character, and make something that I was proud of. And I was able to achieve just that! I remember the surge of pride I felt when every piece of the costume came together. Putting it all on the wig and makeup was a magical moment. Feeling like you completely the embody a character’s essence is such a personal part of cosplay. “Becoming” that character, knowing that all your efforts finally paid off, and being able to manifest that love for your character is something that I treasure deeply. Cosplaying Jade’s God Tier was my first genuine experience with this special aspect of cosplaying, and that feeling still hasn’t slipped away every time I slip into this outfit. This is why that if/when I remake pieces of this costume, or even decide to quit cosplaying her God Tier all together, I will not toss away the original tunic or ears. They serve as a personal reminder for one of the most magical parts of cosplaying: Putting forth the time and effort to embody a character that has clearly left some impression upon you!
Cheers,
Sarah

Sarah, Love your blog, and the detailed manner in which you show the step-by-step construction of your costume. This costume turned out fantastic!!! I absolutely love the rhinestone design on the top and it was totally worth the time and effort it took to do it this way - a very professional look. Looking forward to your next post. Cheers from Arrowhead Gramma.
ReplyDeleteabout how many rhinestones did you need for the shirt symbol?? thanks!
ReplyDeleteOkay, so this is embarrassing to say, but this will be my first time cosplaying. I recently got into Homestuck (Act 6 woo!) a couple of months ago, and I thought it would be cool that Jade and the other kids are also 13. I want to challenge myself, but after looking at a bunch of tutorials and tips on how to make a God Tier Jade, I was starting to lose hope. That was until I came up onto your tutorial! And man did you really help! Of course I'm using a multitude of other's advice, but yours really hit the nail! Even though you don't give precise measurements (you really can't, after all, since everybody has a different height), you give a variety of recommendations, references, detailed steps, fabrics, and much more! Your perspective of her God Tier is so unique, and I love all of your own additions to it!
ReplyDeleteAnd I'm starting to ramble. What I wanted to say was thanks for describing, as Arrowhead Gramma said, your step-by-step insight of your God-tier Jade. Anyways, wish me luck this Halloeween! :)
beautiful!
ReplyDeleteHi, thank you for posting this tutorial! I want to make a jade Harley god tier costume like you did. While you seemed to struggle with a few parts like you described, your entire cosplay is fantastic! Thank you again, hope your life's been good all these years.
ReplyDelete